Welcome back to our Gutenberg blog series!
In our first post, Future of WordPress: Hello, Gutenberg, we introduced you to the Gutenberg editor and covered many of the great capabilities and features it will bring to WordPress. This time, we’ll walk through four straightforward steps to get your WordPress website prepared for the release of Gutenberg.
The good news is that you don’t need to wait until the official release of Gutenberg to see if your site is compatible. As we mentioned in the first article, it is available right now as a plugin.
For this guide we’ll be using a demonstration website. It’s a fairly simple site, but it makes use of several content editor customizations and plugins that represent the different ways a typical site could be affected by transitioning to Gutenberg.
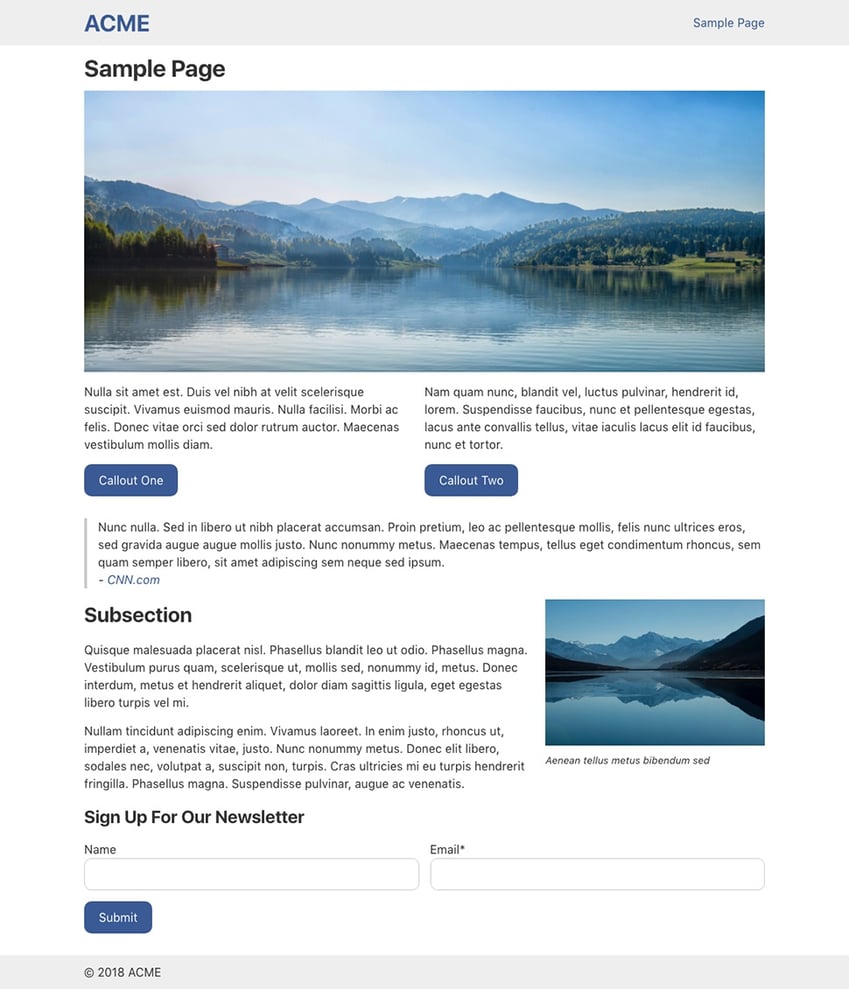 Introducing the website of ACME Corporation! They are big fans of minimalist design.
Step 1: Set up testing environment
Our first and most important step is to set up a safe environment in which we can test the site. It’s likely that you’ll be creating test pages, deactivating plugins, and generally causing a mess over the course of testing Gutenberg. These are obviously not risks you want to take with your live website.
You can use any hosting provider for your test environment or even work locally. However, we recommend Pantheon, as it provides development and test environments that can be synchronized with your live content in just a few clicks.
Depending on your needs, you might consider becoming a Pantheon partner; our partnership allows us to efficiently build, stage, and launch enterprise websites. If your site is not already on Pantheon, you can still create a developer account and migrate your site to a development environment for free.
Step 2: Audit custom editor functionality
Before we install the Gutenberg plugin, we want to review the site and identify any custom theme features or plugins that add, remove, or alter the functionality of the WordPress editor. These are the features most likely to be affected by the new editor.
To do this you will want to head to a post or page edit screen and take note of any of the following:
- Non-standard fields or options that have been added to the edit screen
- Buttons that have been added to the WYSIWYG editor
- Standard fields or buttons that have been removed
- Shortcodes
- Custom editor stylesheet
To be extra thorough, you will also want to have a developer check your theme and active plugins for any uses of filters that transform the_content.
Be aware that some themes may have multiple page templates that affect the fields that are displayed on the edit screen. Select each page template and note any changes.
Lastly, if your site makes use of any custom content types beyond the standard WordPress posts and pages, you will want to make sure you check the edit screens for those as well.
For this task, it helps to have some familiarity with the functionality WordPress provides by default, as opposed to what is custom to your theme or provided by plugins. If your site is built well, it may be difficult to tell which is which.
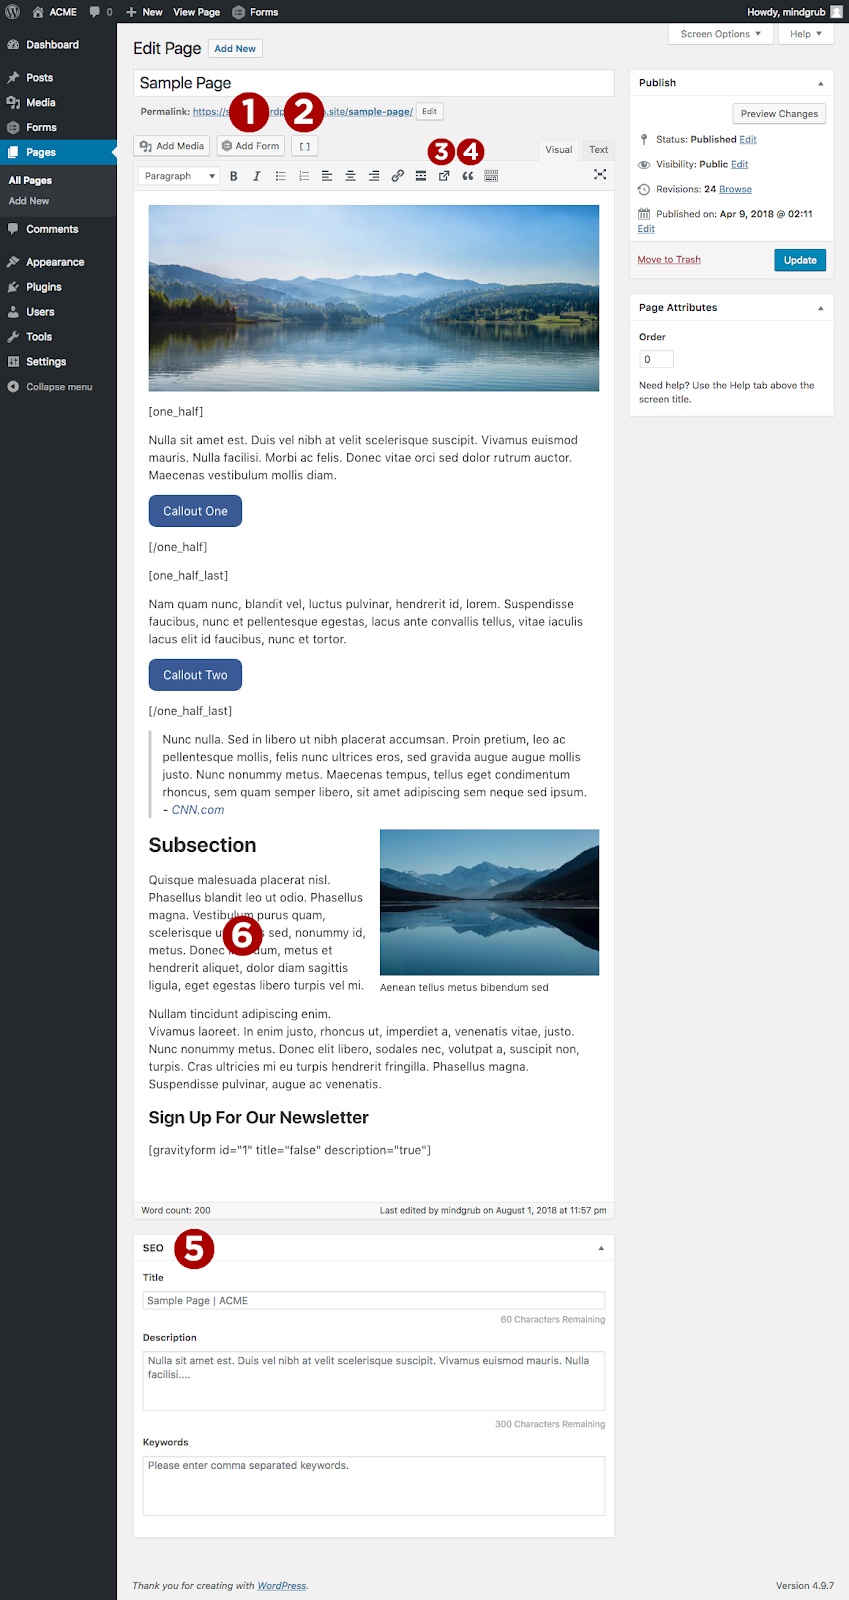
ACME Corporation’s site is very simple and only makes use of the page content type. Let’s take a look at the edit screen for the page we looked at earlier.
- Forms
One of the first things we notice is the “Add Form” button above the WYSIWYG editor. This button is added by the Gravity Forms plugin, which allows us to create forms and embed them in posts and pages. The shortcode under “Sign Up For Our Newsletter” was generated by this button.
The Gutenberg editor still supports shortcodes, but that button will likely go away, which will make it tedious to generate these shortcodes in the future. - Columns
Right next to the form button is another shortcode generator provided by the Column Shortcodes plugin. These shortcodes allow us to structure out content in responsive columns like the two callouts on our sample page. The “one_half” shortcodes were generated by this button. - Buttons
In the WYSIWYG editor toolbar we have a custom tool that allows us to create buttons that match the style of the theme.
- Blockquotes
Next to the button tool, we have a blockquote tool. If you’re a seasoned WordPress veteran you might be thinking, “Isn’t blockquote a default toolbar option?”
And you would be correct.
However, this blockquote tool is customized to allow you to cite and link to a source.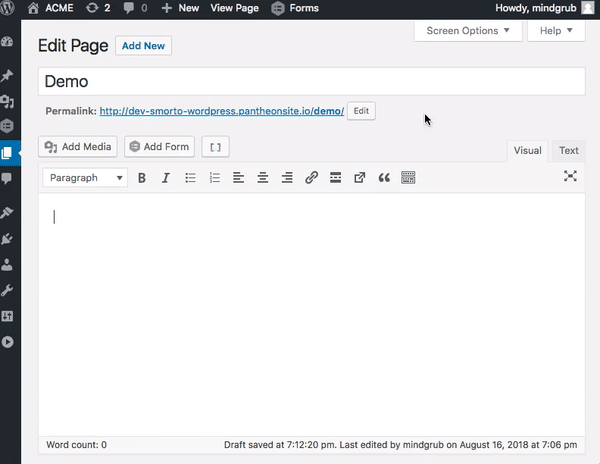
- Search Engine Optimization
Below the WYSIWYG editor we have a custom meta box containing fields for entering search engine optimization (SEO) data. This is provided by a custom plugin, written by yours truly, to be a barebones alternative to the popular Yoast SEO.
- Custom Editor Stylesheet
Lastly, those of you with very sharp eyes might have caught the fact that the ACME Corporation theme uses a custom editor stylesheet to help the editor experience more closely match the fonts and design of the front-end of the site.
Step 3: Test Gutenberg plugin and resolve issues
Now that we have completed our audit of the existing editor customizations, we are ready to install the Gutenberg plugin and test the site!
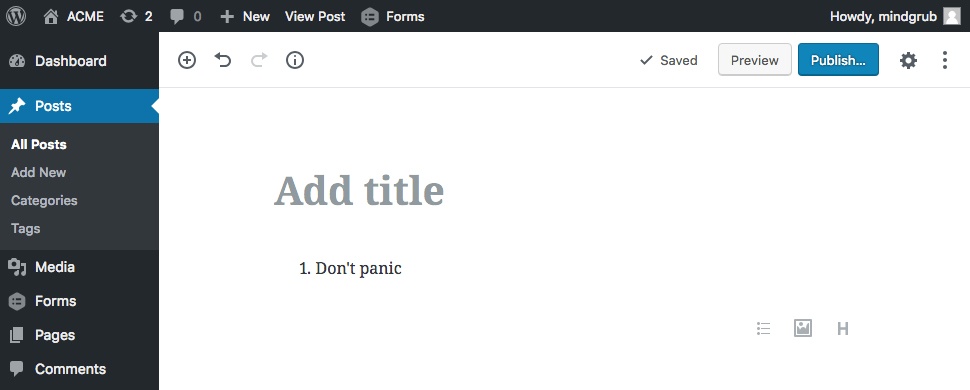
For this step, simply install and activate the Gutenberg plugin, then revisit your edit screens. It should look something like this:
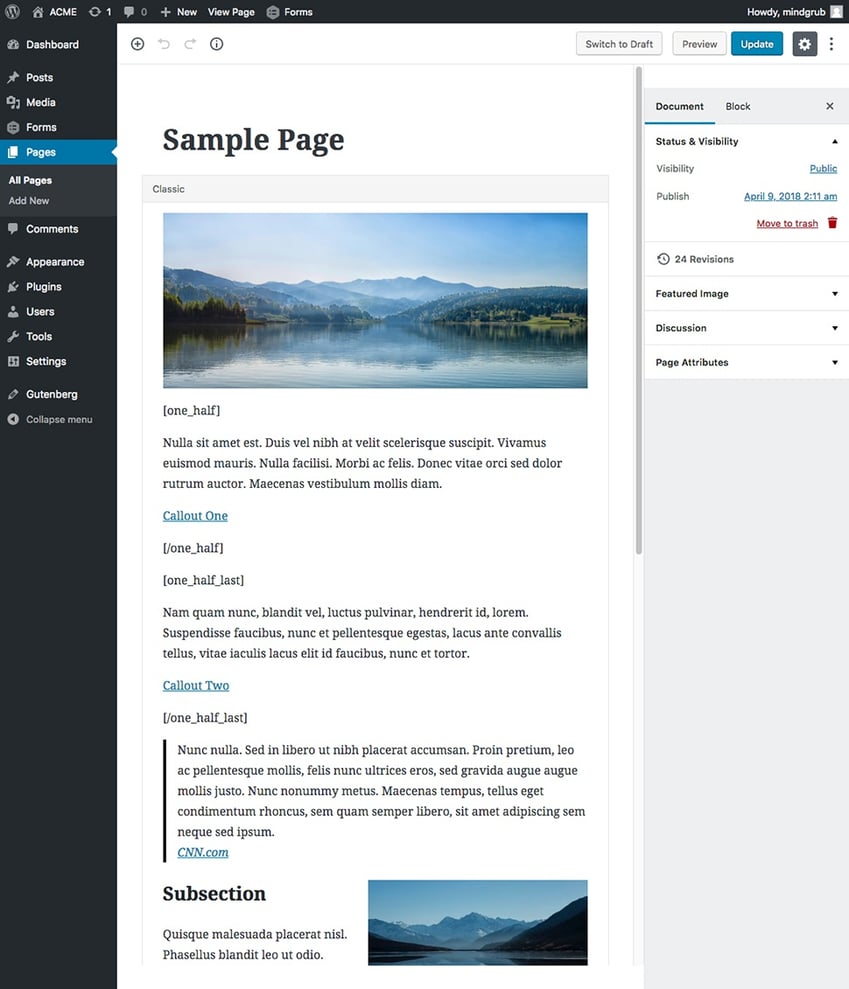
By default, your content will be contained within a “Classic” block. This is Gutenberg’s way of preserving your existing content. If you click into the block, the old WYSIWYG editor is available and should still be fully functional. All of your old content will look and function the same.
However, to really test things out and get the full benefit from Gutenberg for new posts going forward, we need to convert this content to the new block-based system.
To do this, hover over the block, click the vertical ellipsis in the top right corner, and click the “Convert to Blocks” button. Now that we have converted the content into blocks, let’s review the list we made in the last step and see which features or plugins need adjustments.
For those, we will want to find and test a solution or identify an upgrade path.
- Forms
Our “Add Form” button has disappeared, but our existing Gravity Forms shortcode was correctly detected and converted into a shortcode block. Our forms on the front-end still work and look as expected.
We could continue using Gravity Forms by manually writing shortcodes, but that process could be tedious.
A quick search reveals that Gravity Forms has a Gutenberg addon currently in beta with plans to merge into the plugin core when Gutenberg is officially released.
At the time of this writing, the addon beta was not functioning as intended (Gutenberg v3.4.0 and Gravity Forms Gutenberg Add-On v1.0-beta-4), but Gravity Forms is a very well supported plugin. We can be confident that a functioning version will be available soon. - Columns
Our columns button has disappeared as well, and unfortunately the shortcode did not get converted into a shortcode block.
Fortunately though, Gutenberg features a native columns block, which allows us to separate our content into two or more columns that may contain other blocks.
After creating a columns block and dragging and dropping our existing callout content into it, our content looks great in the editor.
No more guesswork and testing with shortcodes!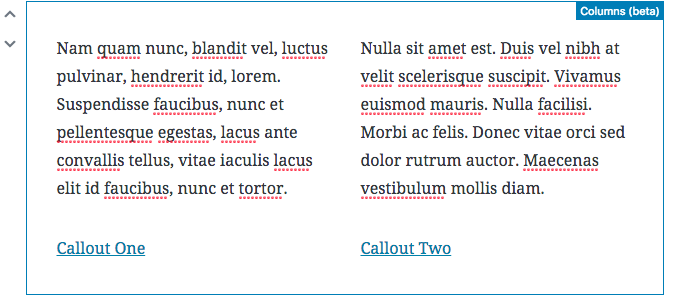
- Buttons
Our buttons have been converted into paragraph blocks and stripped of their styles. They now appear as regular links in the editor and on the front-end of the site.
Fortunately, just like with columns, there is now a native button block within Gutenberg.
The new block handles styling for the buttons in both the editor and on the front-end, and even allows the user to customize the text and background color.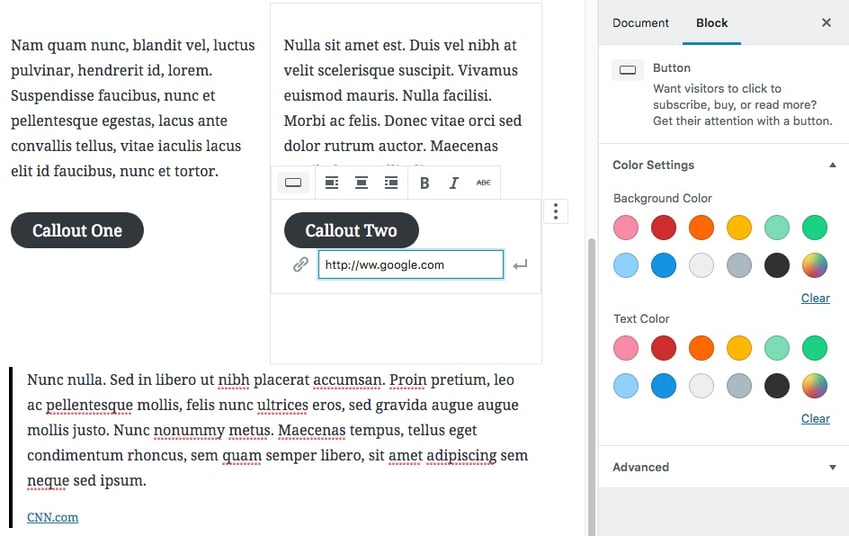
- Blockquotes
Our custom blockquote was correctly detected as a blockquote block. The Gutenberg blockquote block even supports citations natively!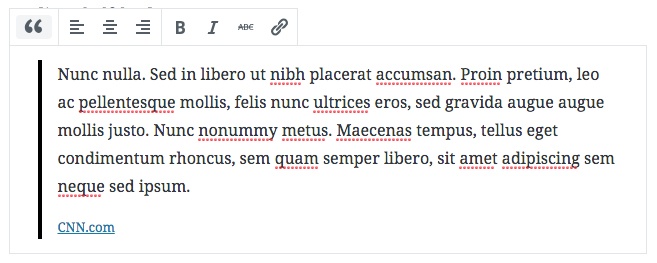
- Search Engine Optimization
Gutenberg provides a fallback for traditional metabox fields. Our SEO fields appear at the bottom of the edit screen in an expandable “shelf.” I tested each of the fields and verified that they still worked as intended. - Custom Editor Stylesheet
Unfortunately, our old custom editor stylesheet has no effect in Gutenberg. Our custom fonts are not being used and spacing is off a bit from the front-end of the site.
Likewise, on the front-end of the site the new column, button, and blockquote blocks produce HTML markup that differs slightly from the old editor customizations. We’ll need to make slight CSS adjustments to our theme to keep them looking the same as before.
Gutenberg requires theme developers to take a slightly different approach to making your editor and theme styles match. Rich Tabor has an excellent article covering one approach on his blog.
The gist of it is that the old
add_editor_style()call has been replaced by theenqueue_block_editor_assetsaction, which allows you to enqueue a stylesheet specifically for the Gutenberg editor. Your styles need to be adjusted a bit to account for the new markup on the front-end.
The back-end also has some additional margins and padding between elements to account for the editor tools so some fine tuning is required to get a 100% match. If you adhere to low specificity practices you will find that some of the Gutenberg editor styles will require a bit more specificity to override.
Step 4: Re-test
After reviewing all of the custom editor functionality and plugins and finding upgrade paths for each of them, you may think you are done. However, that is only partially true!
Despite being nearly feature complete, Gutenberg is still under active development. There have been 15 new releases in 2018 alone.
If you want to hit the ground running with Gutenberg on day one of the official release, you will want to occasionally verify that your upgrade path is still valid.
You should not need to repeat this process from scratch; simply installing the newest version of the Gutenberg plugin, updating your test page(s), and checking for any anomalies should be sufficient.
You most likely will not run into any issues, but it’s possible that one solution you had before might no longer be valid or an issue you had earlier may have a new solution thanks to a new feature or plugin release.
Victory
Preparing an old site for Gutenberg is somewhat time consuming, but the payoff is fantastic.
The new editor really improves on the capabilities of the Classic Editor and opens up a lot of flexibility for expansion in the future.
We hope our demonstration is helpful for you in preparing your own site. We intentionally used fairly simple issues in our demonstration to make it easy to follow, but it’s possible your site may be much more complex.
In this case, following these steps will still be an ideal approach; it will simply take a bit more work to find the right upgrade path.
Running into issues or need help with any of the steps in the process? Get in touch with us and we’ll help you get the most out of Gutenberg on your WordPress website.

